Locations.
Locations :
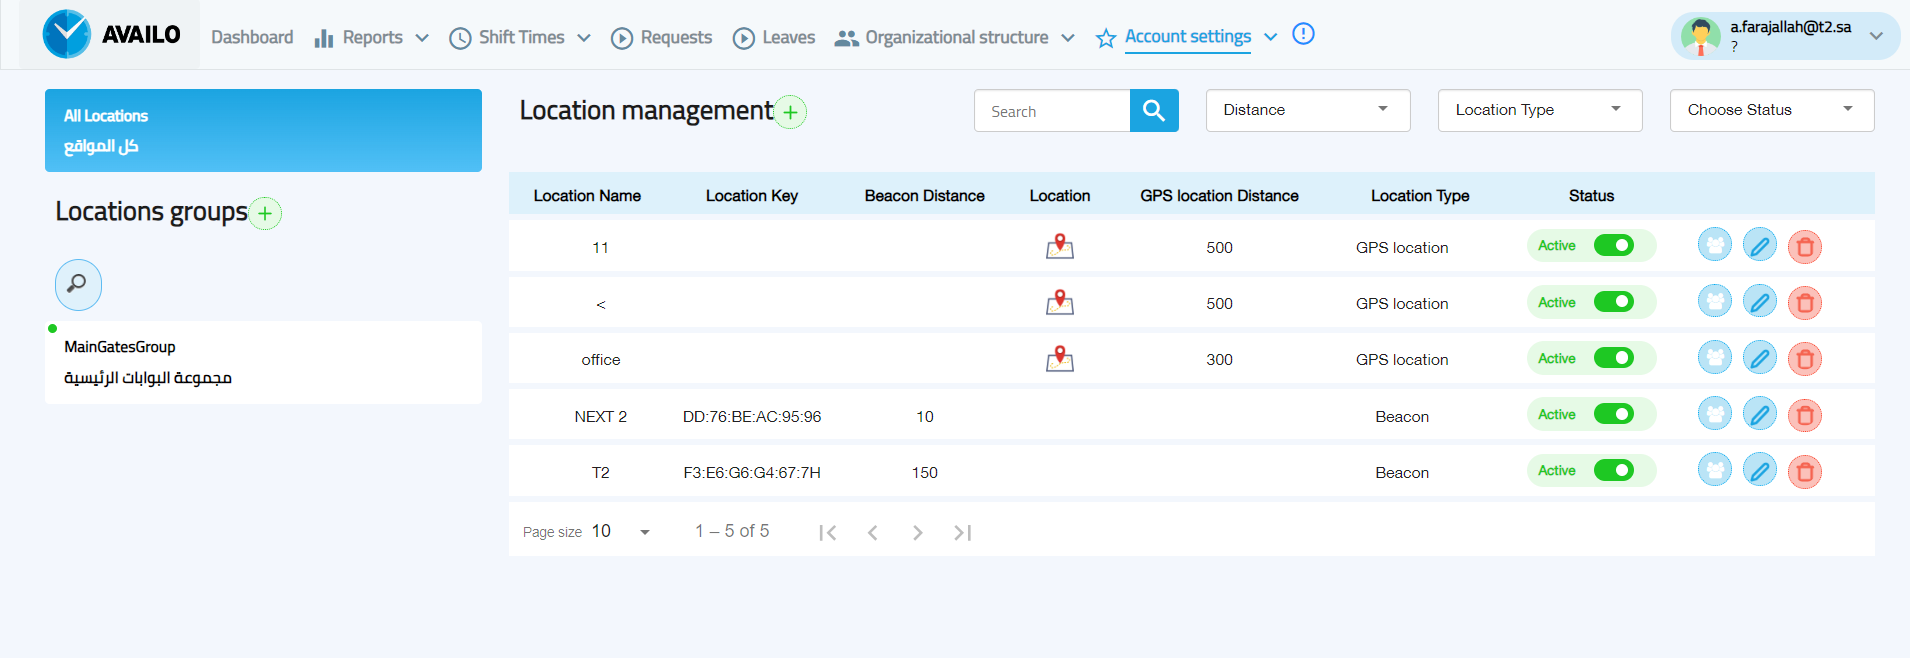
Through the locations screen , the user can add , modify , activate and stop the attendance and absence locations .
Location Name : It is the name of the portal or the place where the attendance and absence device is located .
Device ID : can be added from the number written on the device
Example : (45:F5:56:89:ER:70) .
Distance : User is allowed to conduct the attendance and absence process inside it , and the maximum distance is 100 meters without any barriers .
Status : Active / Inactive .
Location : Which is the attendance by .
GPS Distance : which is dedicated by account manager .
Location Type : (Beacon/GPS/GPS+) .
Delete / Modify : A specific portal can deleted or modified .
(1)
as in figure 1
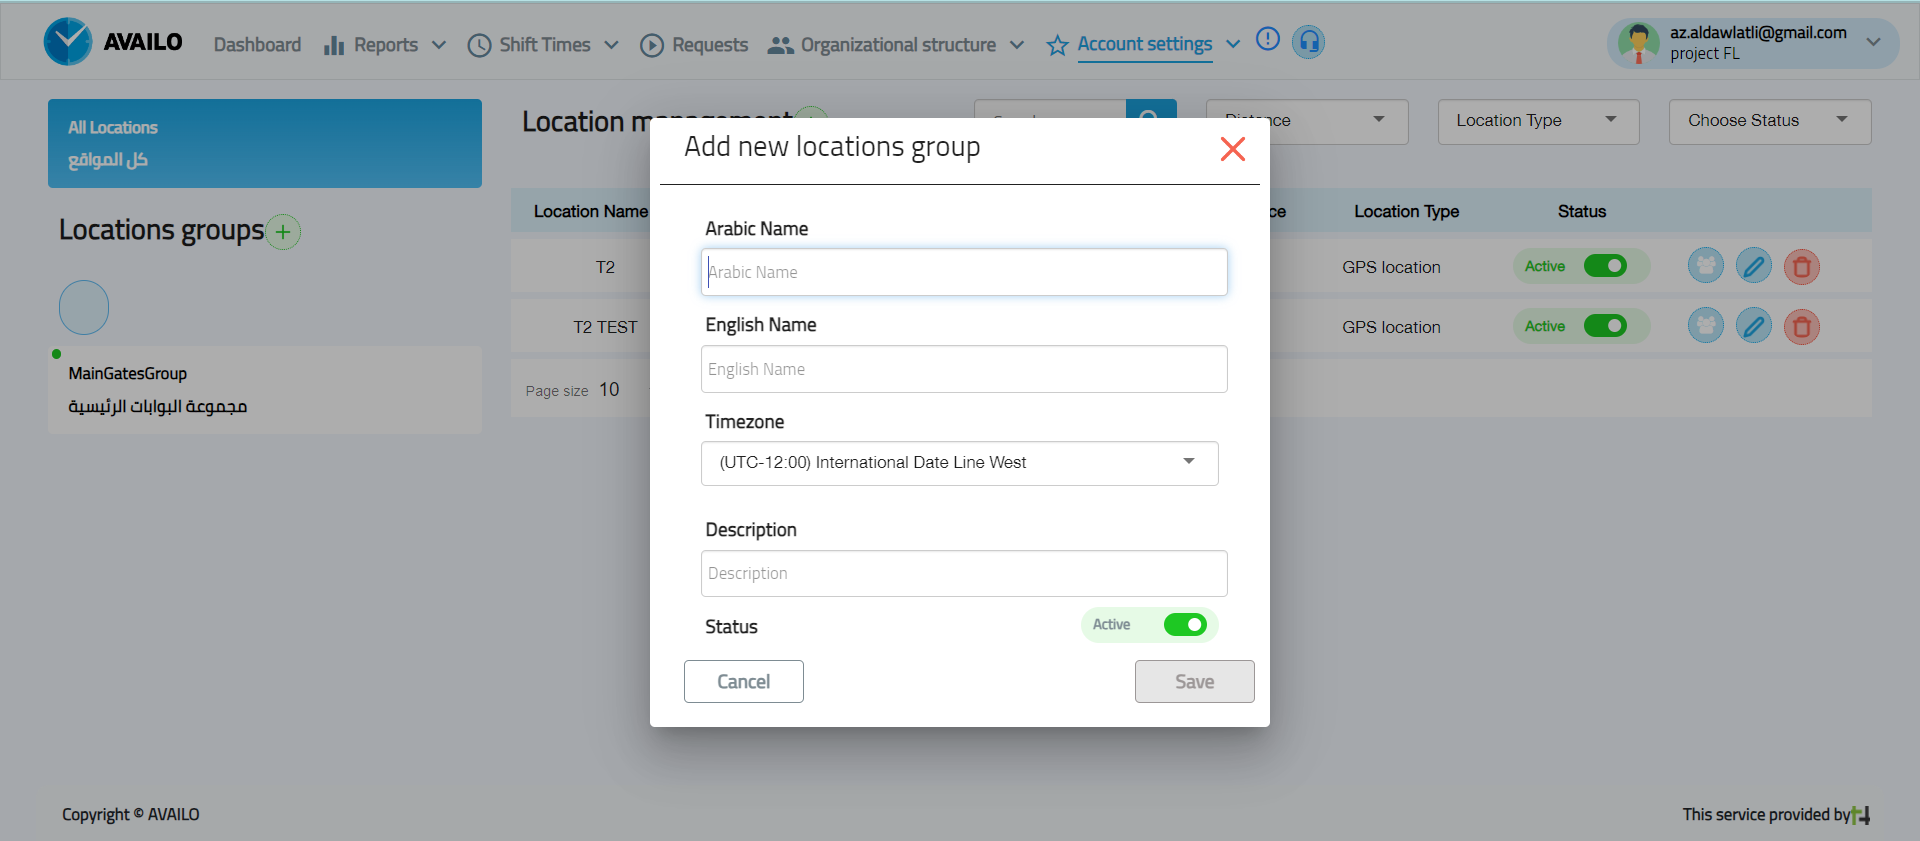
You can create new location by clicking on the (+) sign :
-The name in (English and Arabic) .
- Description : Add the appropriate description for the location group according to the account manager vision.
- location groups can be modified , deleted or deactivated .
- putting the modifying , on the existing location within the group ,where a new site is added or an existing site is deleted or deactivated.
 (2)
(2)
as in figure 2
MANAGE LOCATIONS :
So that the system allows you to monitor attendance by many methods like :
Beacons , Beacons with GPS , and add the GPS+ location of the place from which you want to attend your employees , and you can link the smart attendance system device to this site , to ensure high accuracy for determine the correct location of the employee .
How to activate this service :
-
Click on the locations option .
Click on Add a New Website Three options will appear :
-
Beacon preparation device .
-
GPS .
-
GPS+ .
The following figure show you the activation method :
(3)
as in figure 3
BEACON DEVICE :
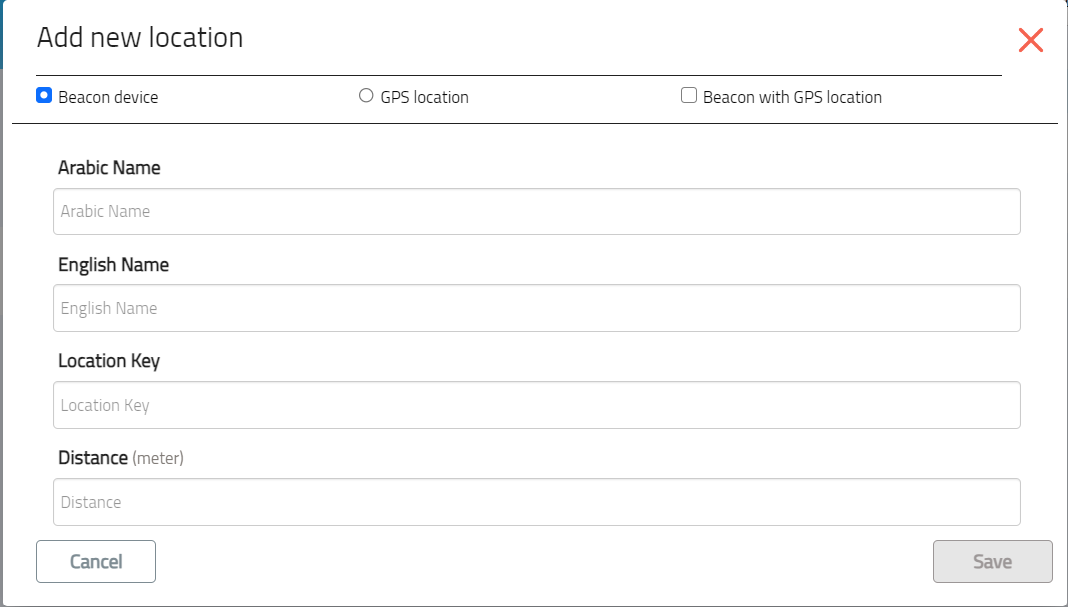
When you click on add a beacon the following screen will appear as shown in figure 4 :
- Location name : the location and the distinction between them .
- Location key : the code written on the beacon .
- Distance : choose the distance from 30-100 meters .

(4)
as in figure 4
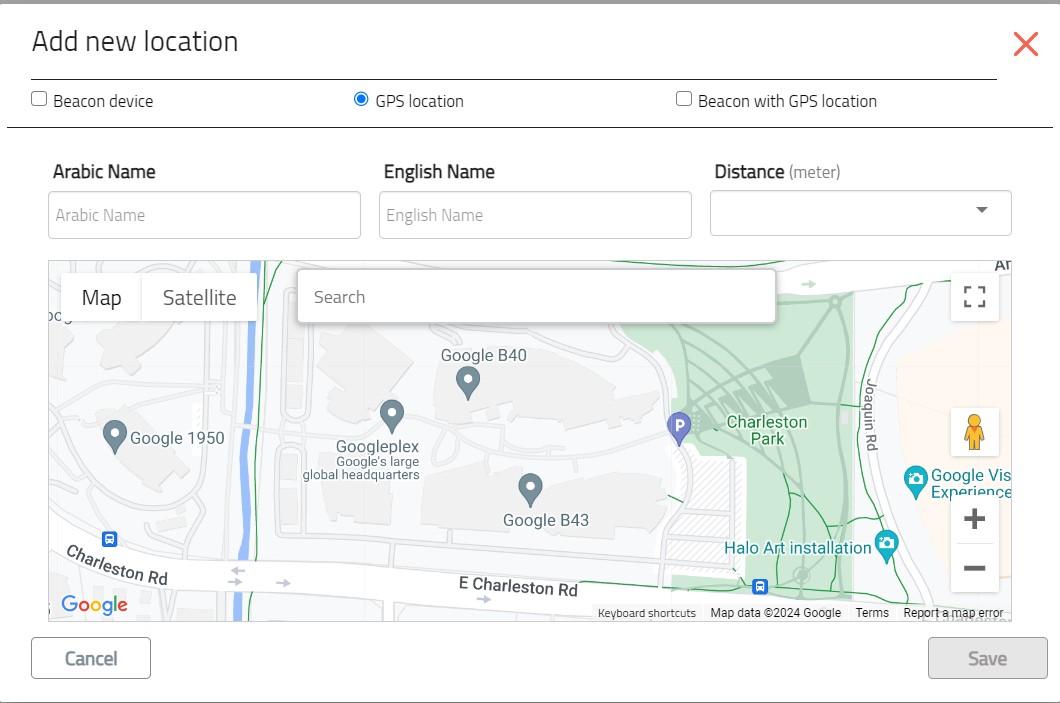
GPS POSITIONING SYSTEM :
Which appears from choosing a specific location on the map ,planning to record while you are at this location , and you can search for location to facilitate adding the exact location as in .
(5)
as in figure 5
Beacon DEVICE WITH GPS :
which can be linked to the attendance at the specified location.
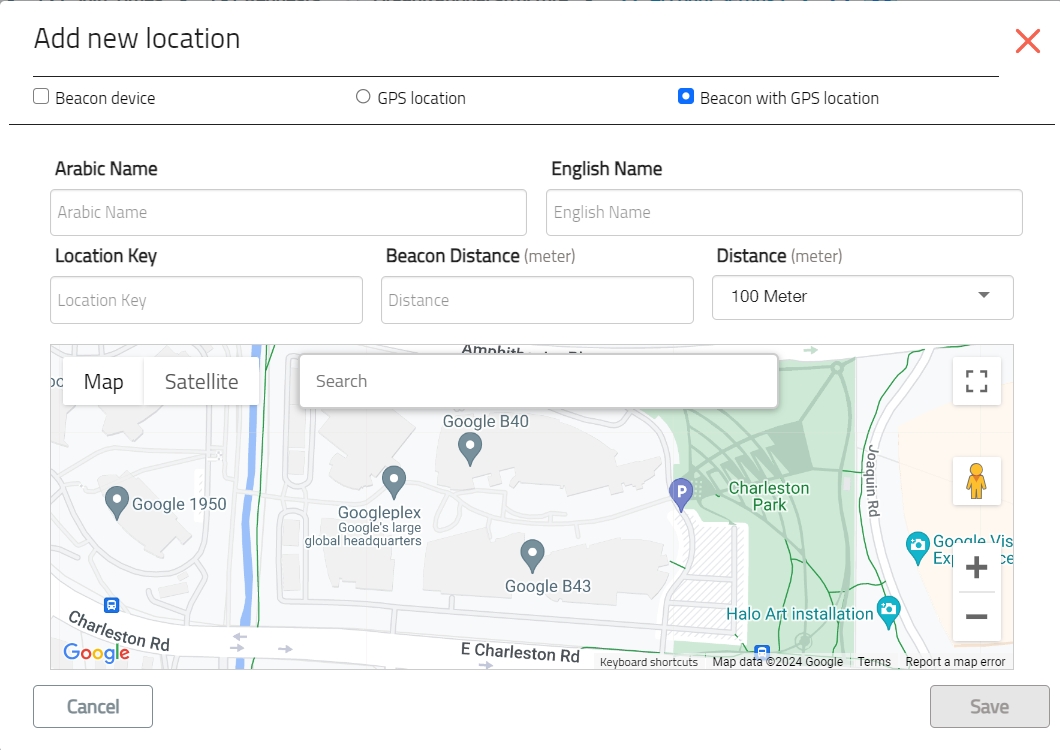
(6)
as in figure 6
connect one location with group of locations klick on the gates group that you want to add the location to it .
After that you should press on (+) sign ( next to the name of gates group) .
You show tow choice :
- Add new location : appear the add location screen by three choices as in figure .
- Add existing location : the screen display group of location in account , and you can determine one location or more .
- Search of location name : Use a filter of location type .

