
Availo Plus App – User Guide v2.2.1

Availo Plus App – User Guide
أفيلو بلس
Biometric Attendance & Workforce Management Platform
Version 2.2.1 | February 2026
T2 Business Research and Development
PartTable of Contents
- Chapter 1:
InitialIntroduction - Chapter 2: Getting Started
- Chapter 3: Daily Attendance
- Chapter 4: Self-Service Requests
- Chapter 5: Account
SetupManagement - Chapter 6: KIOSK Tablet
- Chapter 7: Points System (New in v2.2.1)
- Chapter 8: Admin Space (New in v2.2.1)
- Chapter 9: Administrator Guide
- Chapter 10: Troubleshooting & FAQ
- Chapter 11: Support & Contact
- Appendix A: Arabic Terminology Reference
- Appendix B: Quick Start Card
Chapter 1: Introduction
1.What Downloadingis Availo Plus?
Availo Plus is an IoT-based biometric attendance and workforce management platform designed to modernize how organizations track employee attendance. It replaces traditional hardware attendance machines with smartphone-based biometric verification, offering a seamless, cost-effective solution for businesses of all sizes.
The platform leverages multi-modal biometric authentication, including face recognition, voice recognition, and fingerprint verification, to ensure accurate and secure attendance tracking. Combined with GPS location verification, Availo Plus provides organizations with complete visibility into their workforce.
Key Benefits
- No Hardware Required: Uses employees' own smartphones, eliminating the need for expensive biometric terminals
- Multi-Modal Biometrics: Face, voice, and fingerprint authentication for maximum flexibility and security
- GPS Location Verification: Ensures employees are at authorized locations when checking in
- Self-Service Portal: Employees can submit leave requests, permission requests, and attendance corrections directly through the app
- Admin Dashboard: Real-time reporting, workforce analytics, and complete attendance management
- HR Integration: Connects seamlessly to existing HR and ERP systems for data synchronization
- Bilingual Support: Full Arabic and English language support with light and dark theme options
Supported Platforms
- iOS (iPhone) – Version 15.5+ – Employee mobile app
- Android – Version 8.0+ – Employee mobile app
- iPad – iPadOS 15.5+ – Tablet check-in / KIOSK
- macOS – M1+ (Apple Silicon) – Desktop admin access
- Web Browser – Modern browsers – Admin panel
System Requirements
- Bluetooth: Must be enabled for location verification
- Location Services: Must be enabled for GPS-based check-in verification
- Camera: Required for face recognition biometric enrollment
- Microphone: Required for voice recognition biometric enrollment
- Account Code: Organization account code provided by your administrator
- Internet Connection: Required for data synchronization and real-time updates
Chapter 2: Getting Started
Step 1: Download the App
Availo Plus is available for download on both iOS and CreatingAndroid andevices.
- iOS (iPhone/iPad): App Store
- Android: Google Play
Search for “Availo Plus” in your device’s app store, or use the links above to download directly.
Step 2: Log In to Your Account
Download
- Open the Availo Plus
application from the App Store (iOS) or Google Play (Android). After opening the app forafter theinstallation
first- Enter
time,your follow these steps:
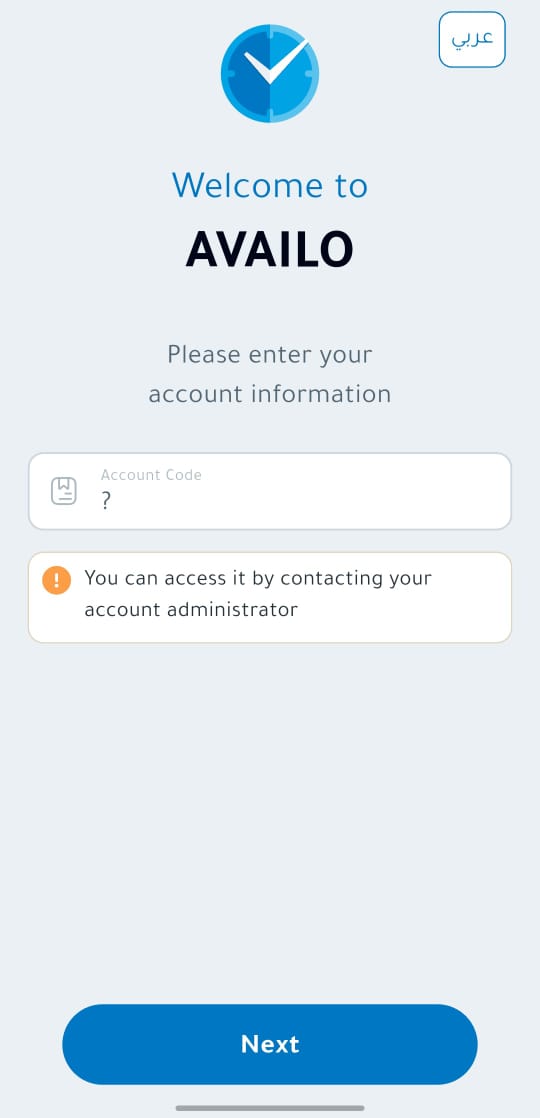
A. Select Language
You can change the app’organization’s language using the language button located in the upper corner of the screen.
B. Enter the Organization Account Code
Theaccount code will be (provided by your systemadministrator)
administrator
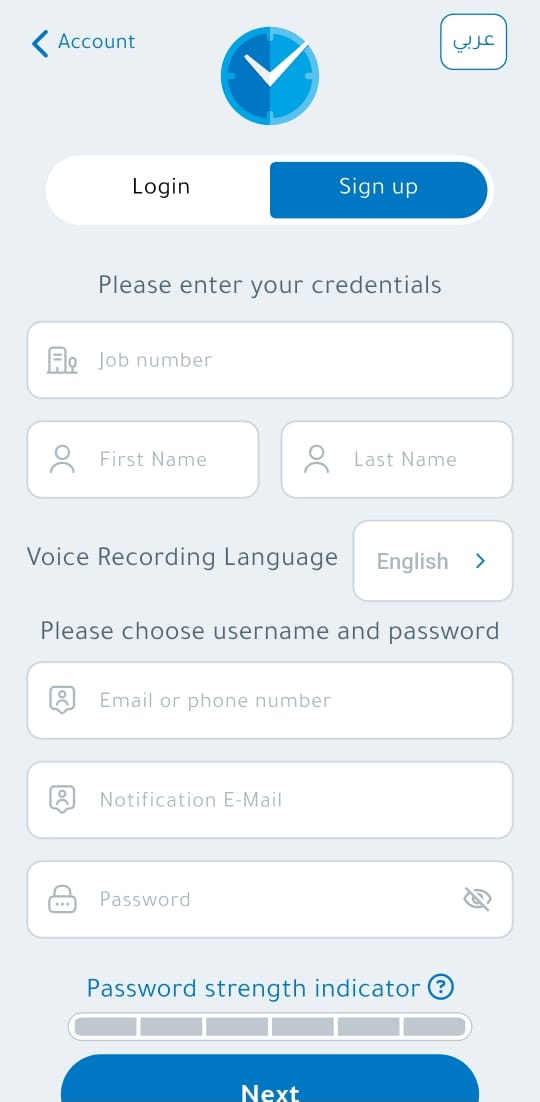
2.Biometric “New Registration” ScreenEnrollment
This screen allows you to create a new user account in the system.
Employee NumberFirst NameLast NameUsername: Can be a phone number or email (used later for login).Password: Set by the user during the first registration.
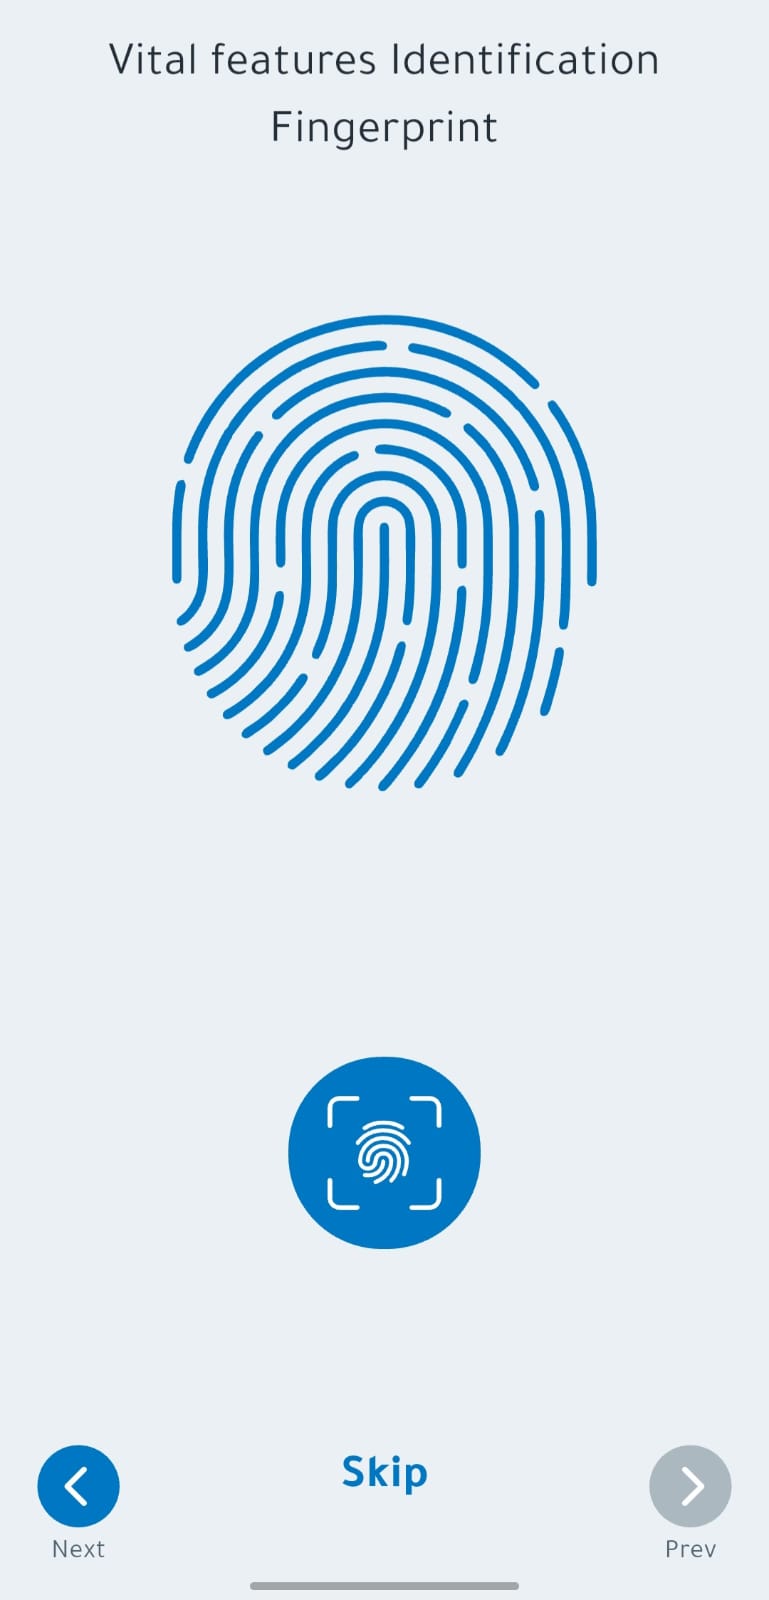
3. Biometric Registration
After enteringlogging valid data,in, you will proceedbe prompted to theenroll your biometric registrationdata. stage:
This - essential
- for
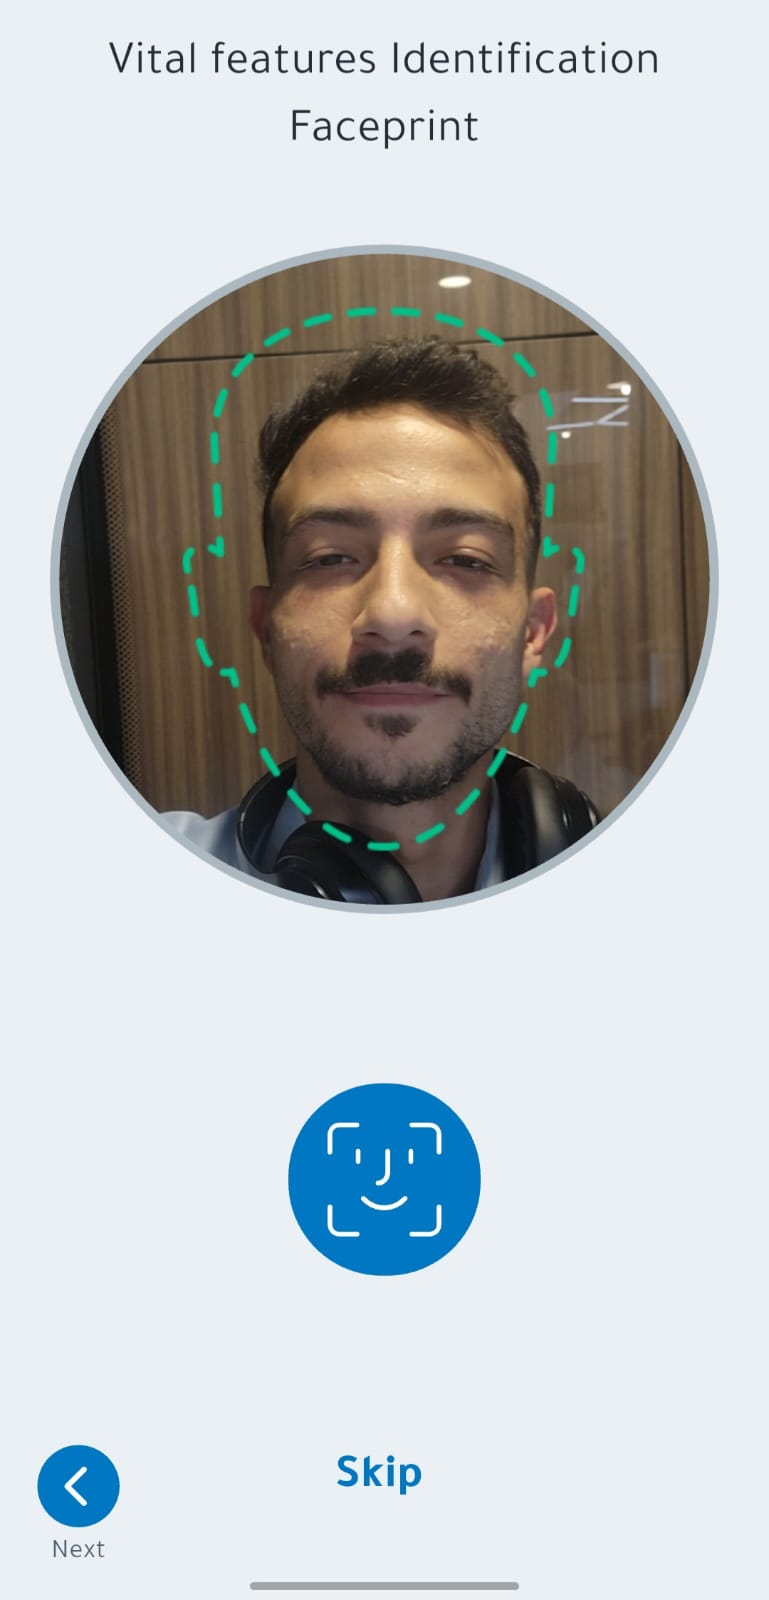
A)secure attendance verification.Face Recognition
EnrollmentEnrollment:The- Ensure
screenyouwillareappear.in a well-lit area with even lighting on your face - Position your face within the on-screen frame
- Look directly at the camera and
captureremainthe photo.
camera - Ensure
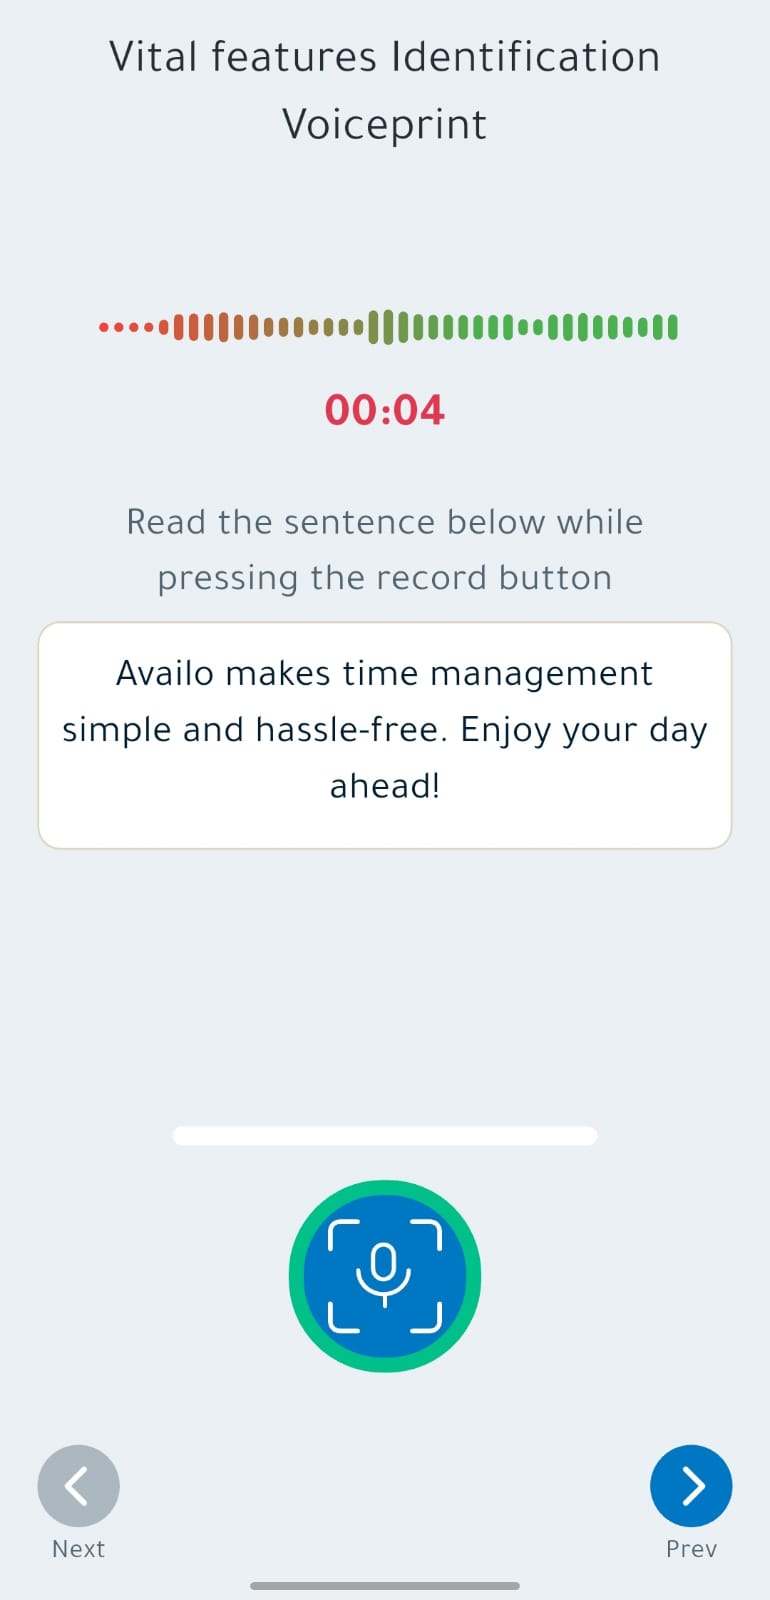
phrases as instructed by the appB)Voice Recognition
EnrollmentEnrollment:You- Find
seeahighlightedquietsentencesenvironmentonwith minimal background noise - Hold the
screen.phoneTapatRecorda comfortable distance from your mouth - Speak clearly and
startatreadinga natural pace when prompted - Repeat the
textrequiredclearly.
will- Find
C)Fingerprint
/Enrollment:TheFaceappIDuses(DevicetheBiometric)You can also enable your device’s
existingbuilt-in biometriclockauthentication (Fingerprint/Touch ID, FaceID).ID,TaporRegisterAndroidandfingerprint) for quick access to thesystemappwillthroughverifytheyourSettingsfingerprint.
menu.
✨ 4.Tips: Completing Registration
After finishing biometric registration,Use a summarywell-lit screen will appear. Tap Submit. Your data will be sent to the system administratorarea for activation.
face
enrollment. ✨ Congratulations! You have successfully createdRecord your account.voice in a quiet environment. Ensure camera and microphone permissions are enabled in your device settings.
PartChapter 2:3: Daily App UsageAttendance
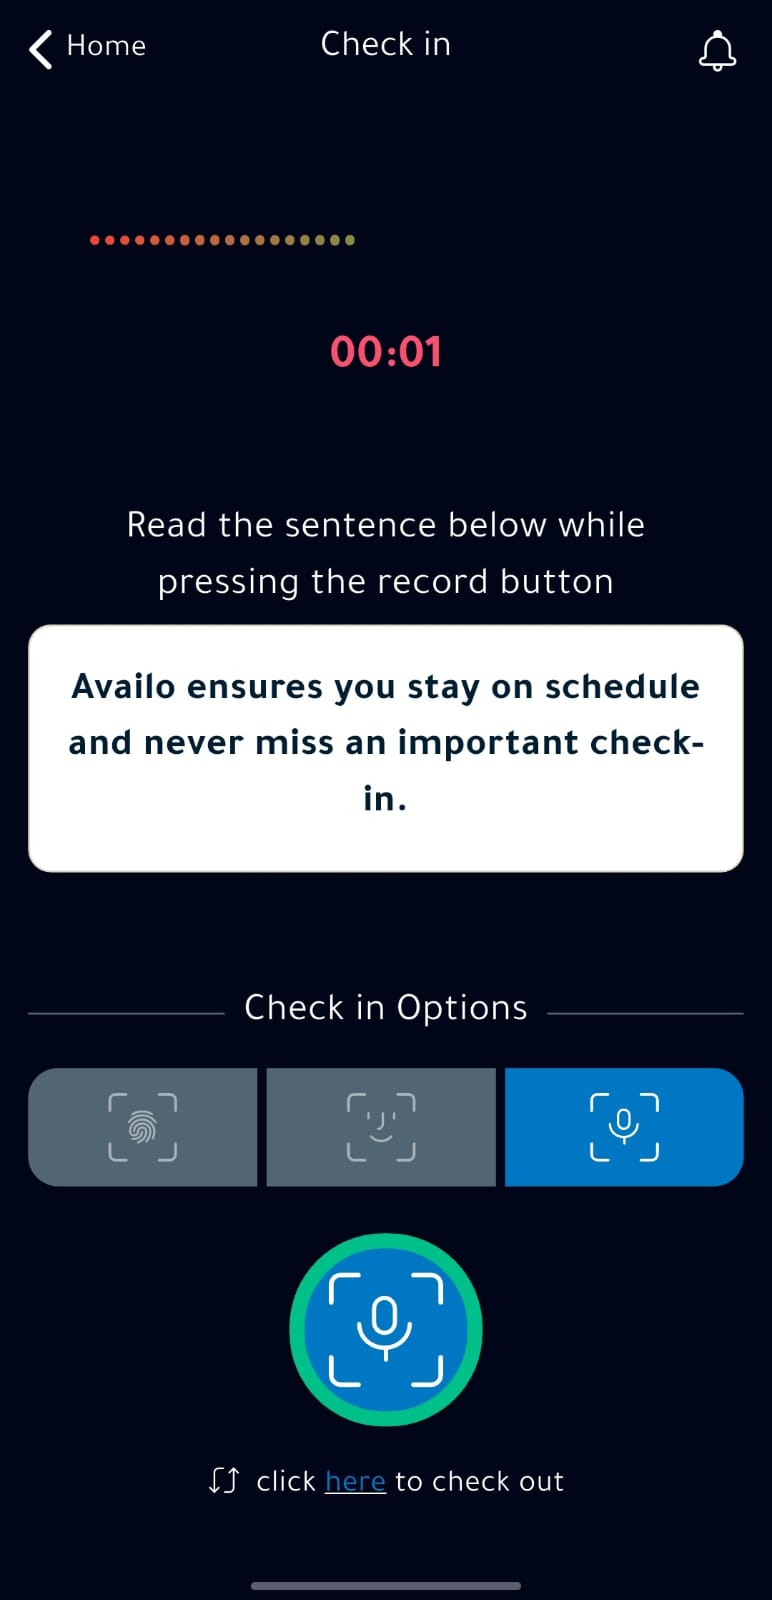
1.How Loginto Check In
AfterChecking in records your accountarrival time and verifies your presence at an authorized location.
- Open the Availo Plus app
- The app will automatically verify your location using GPS and/or Bluetooth
- Complete biometric verification (face or voice recognition)
- Confirm your check-in
⚠️ Location Indicators: A green indicator means you are at an authorized location. A red indicator means your current location is approvednot byauthorized thefor administrator, you can log in to the application. On the Login screen, enter your username and password correctly.
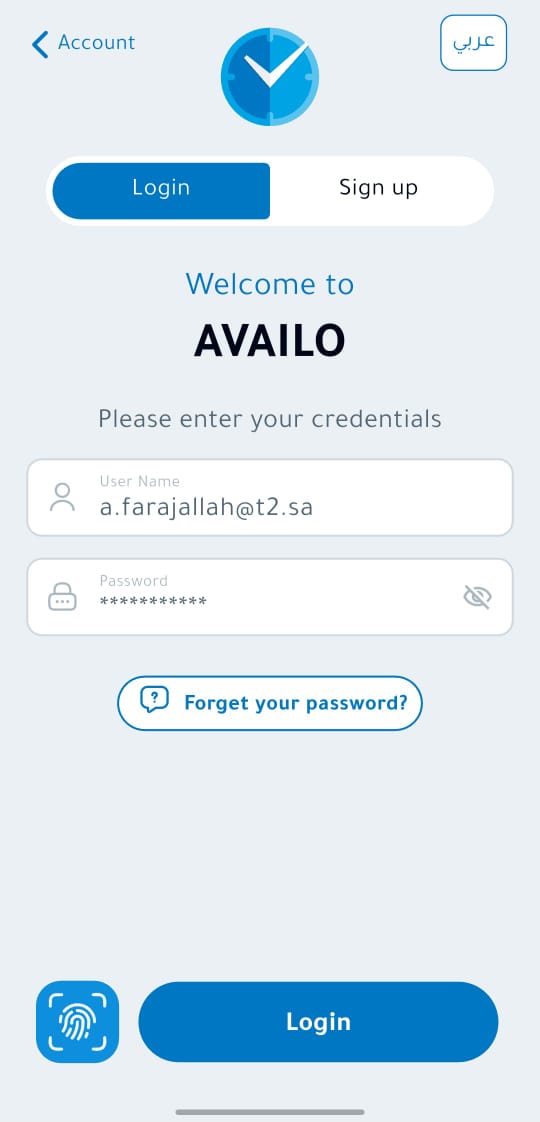
2. Home Screen
After logging in, the Home Screen will appear, which contains:
User Information: Your name, profile picture, and department.
Location Verification: Appears red if no authorized location is found and green when the correct location is detected.
Notifications: Displays all system alerts.
Last Activity: Shows your latest action (Check-in or Check-out).
Hours Counter: Calculates hours and minutes worked.
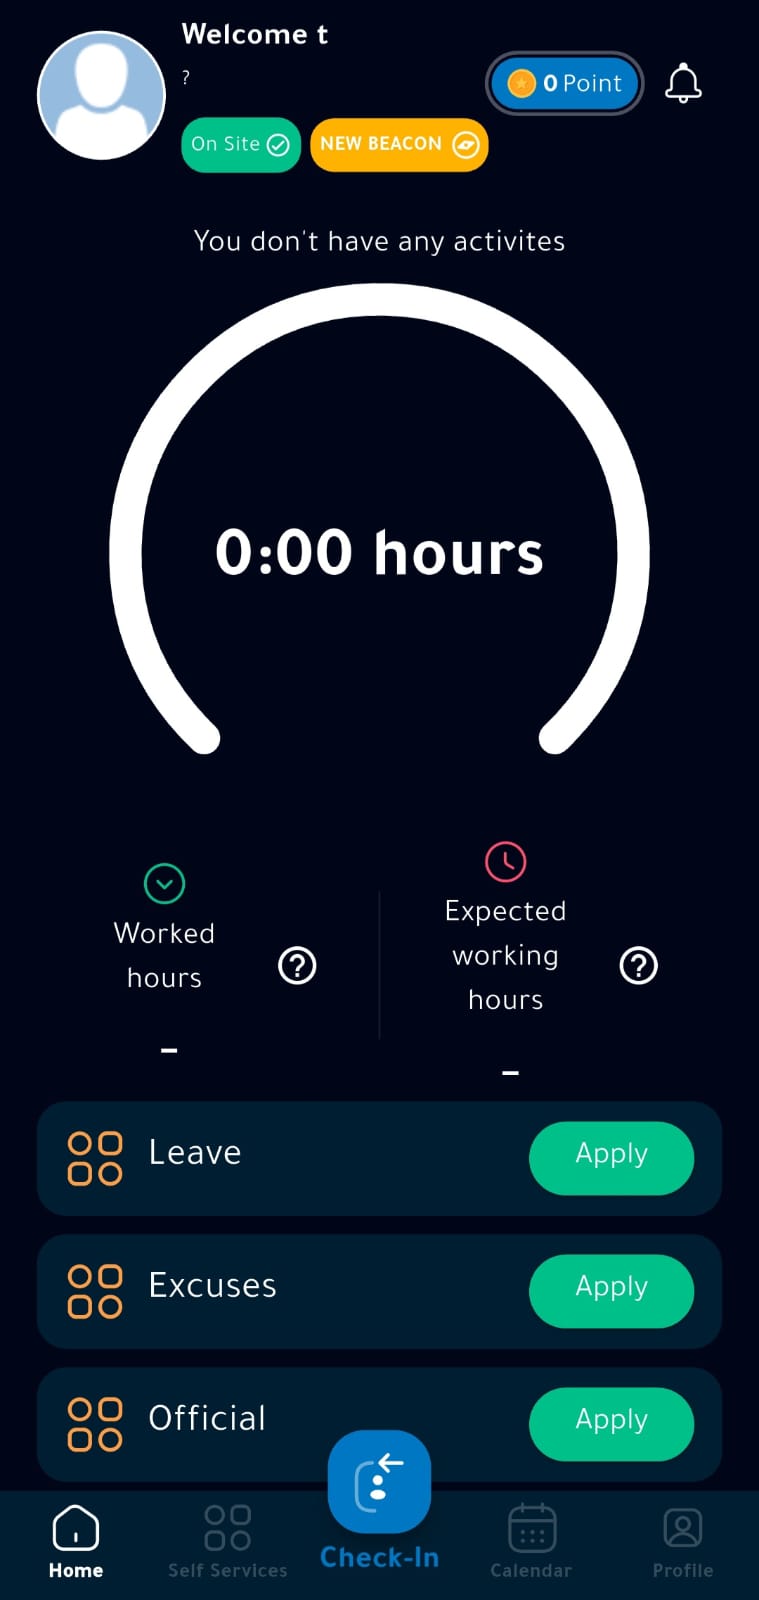
⚠️ Always make sure to enable Bluetooth and Location in the application settings.
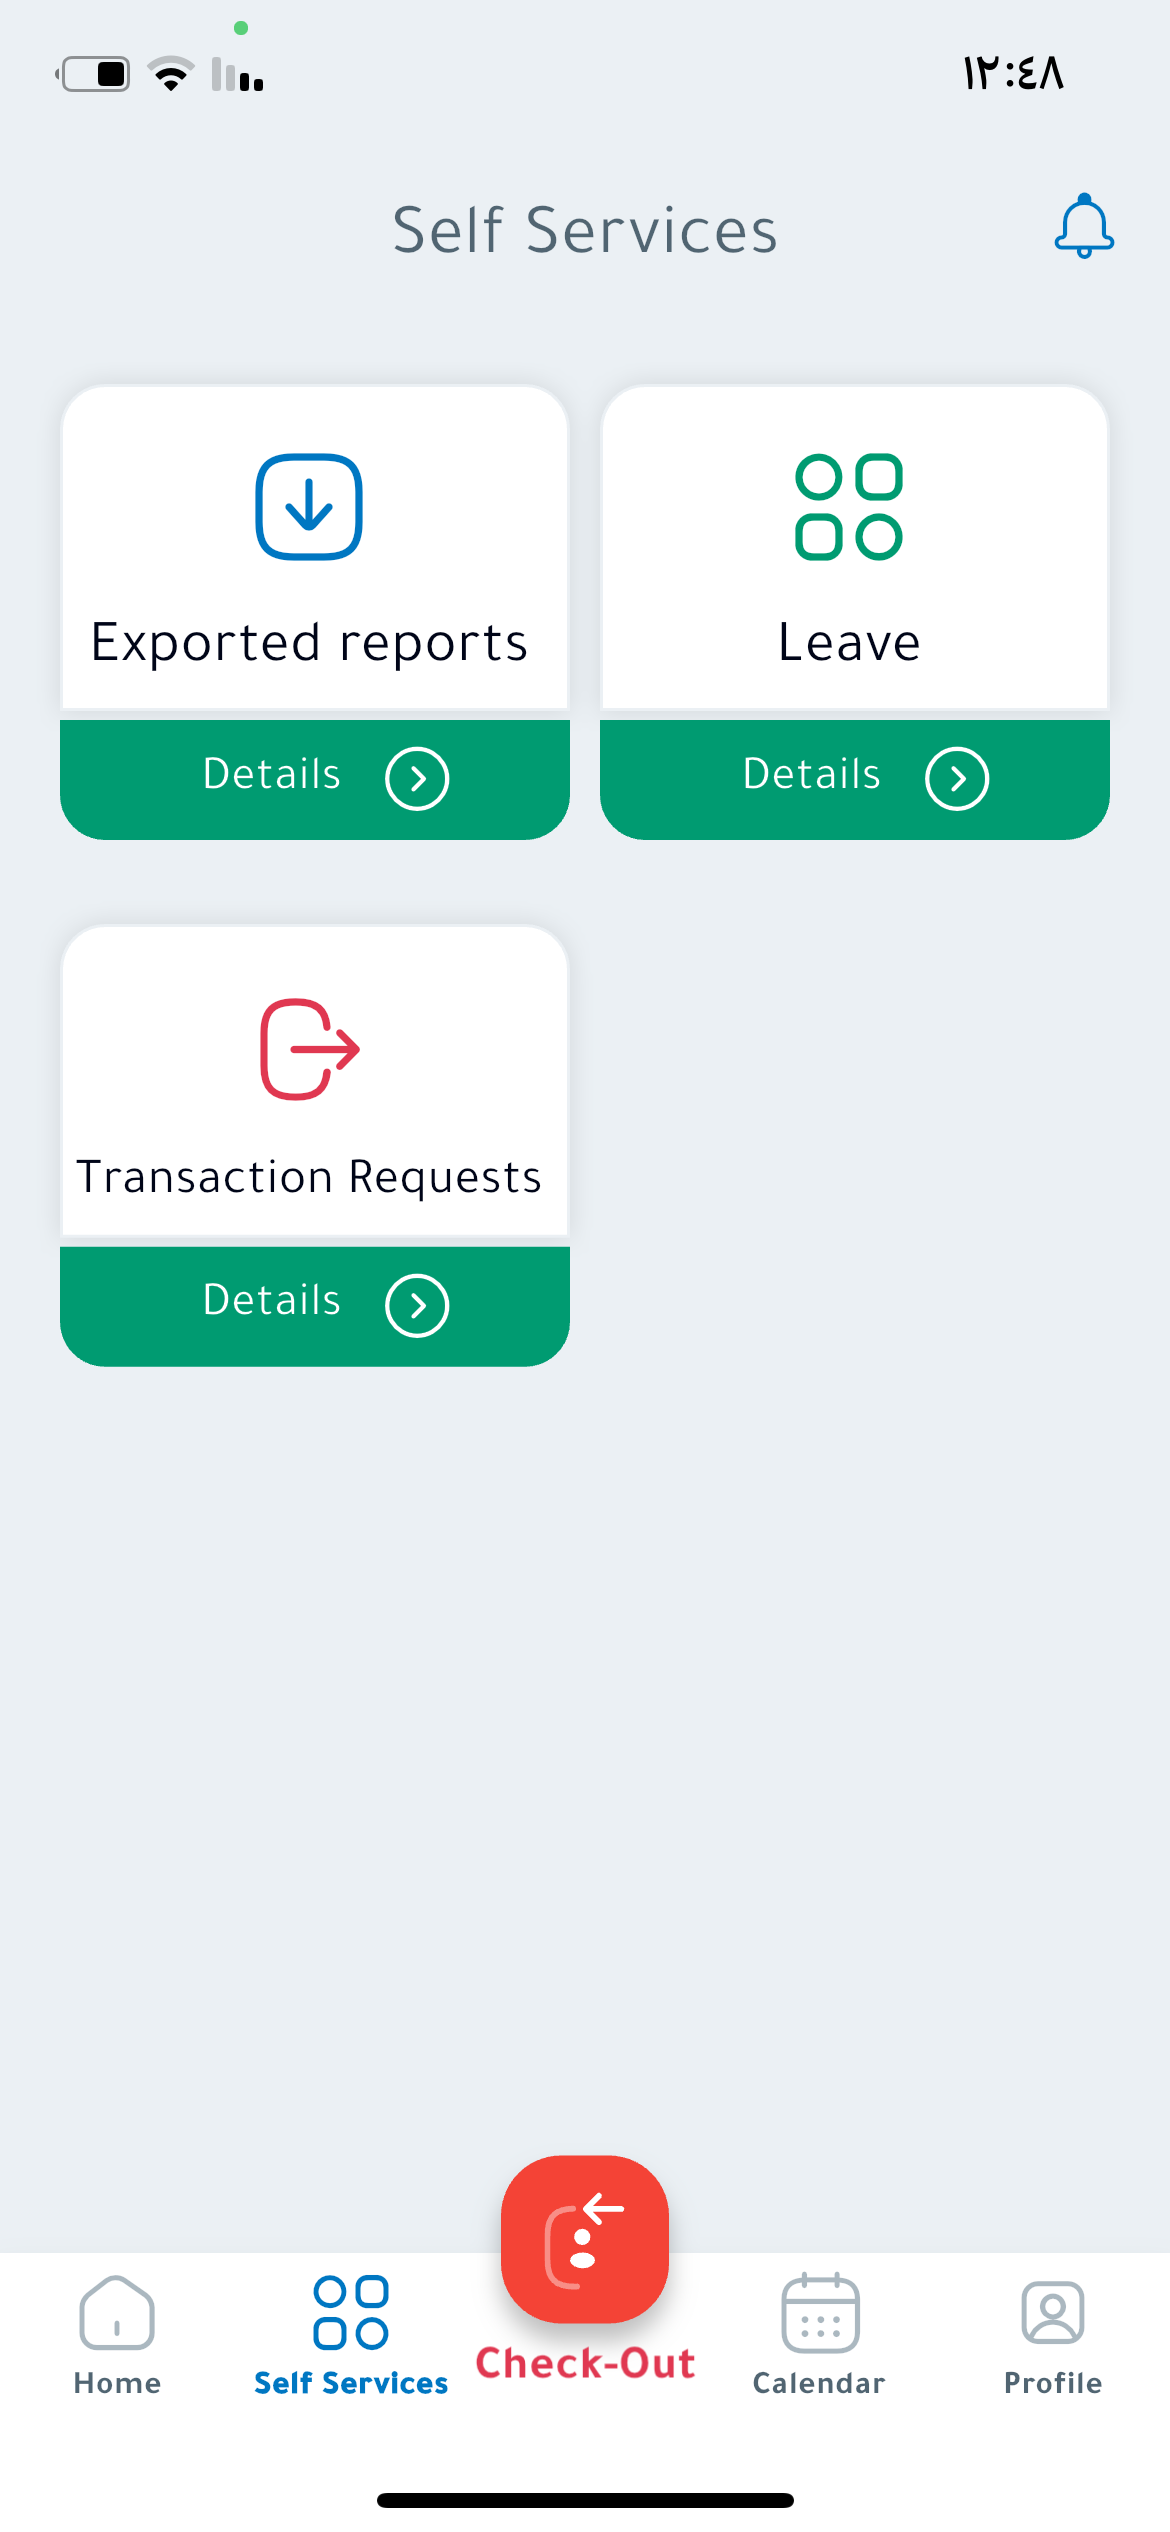
3.How Self-Serviceto ScreenCheck Out
This
Checking screenout allowsfollows youthe tosame submit requests:
Leave:Request a leave and specify its type.Permission:Request a permission (emergency or medical).
recordsOfficial Requests:Suchprocess asassignment,checkingbusinessin.trip,Theorapptraining.your New Exit Request:For a full-day or partial-day exit.Transactions Requests:
yourCheck-out Request:Pick adeparture time anddate,theaddhoursoptionalcounternotes/files,updatesand sendautomatically tothereflectmanager.Check-in Request:Select thetotal timeand current date to log your attendance..
worked.
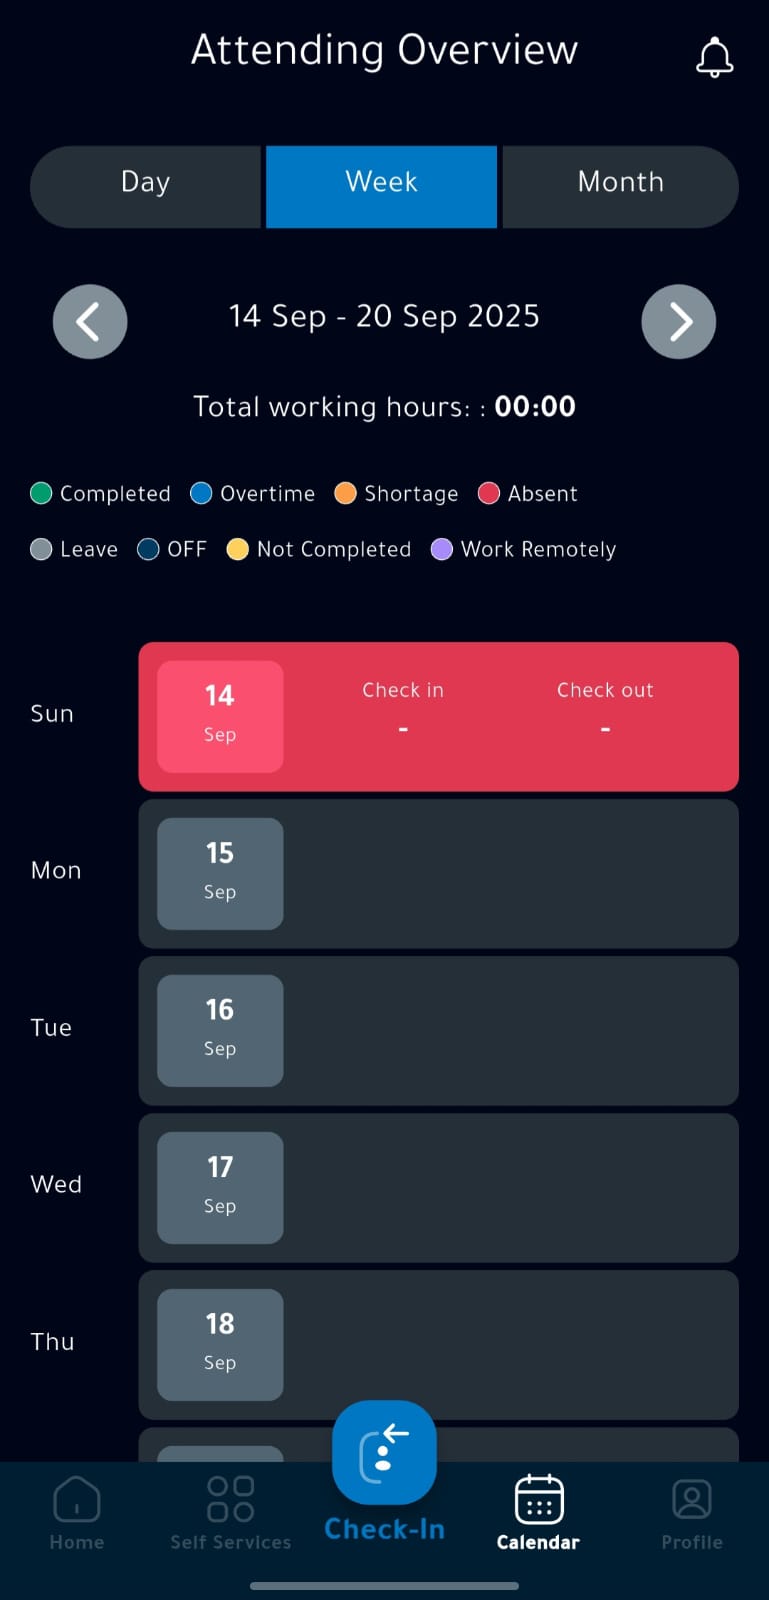
4. Calendar Screen
Here, you can view your attendance and departure details in a daily, weekly, or monthly view.
🔵 Green circle = Check-in🔴 Red circle = Check-out
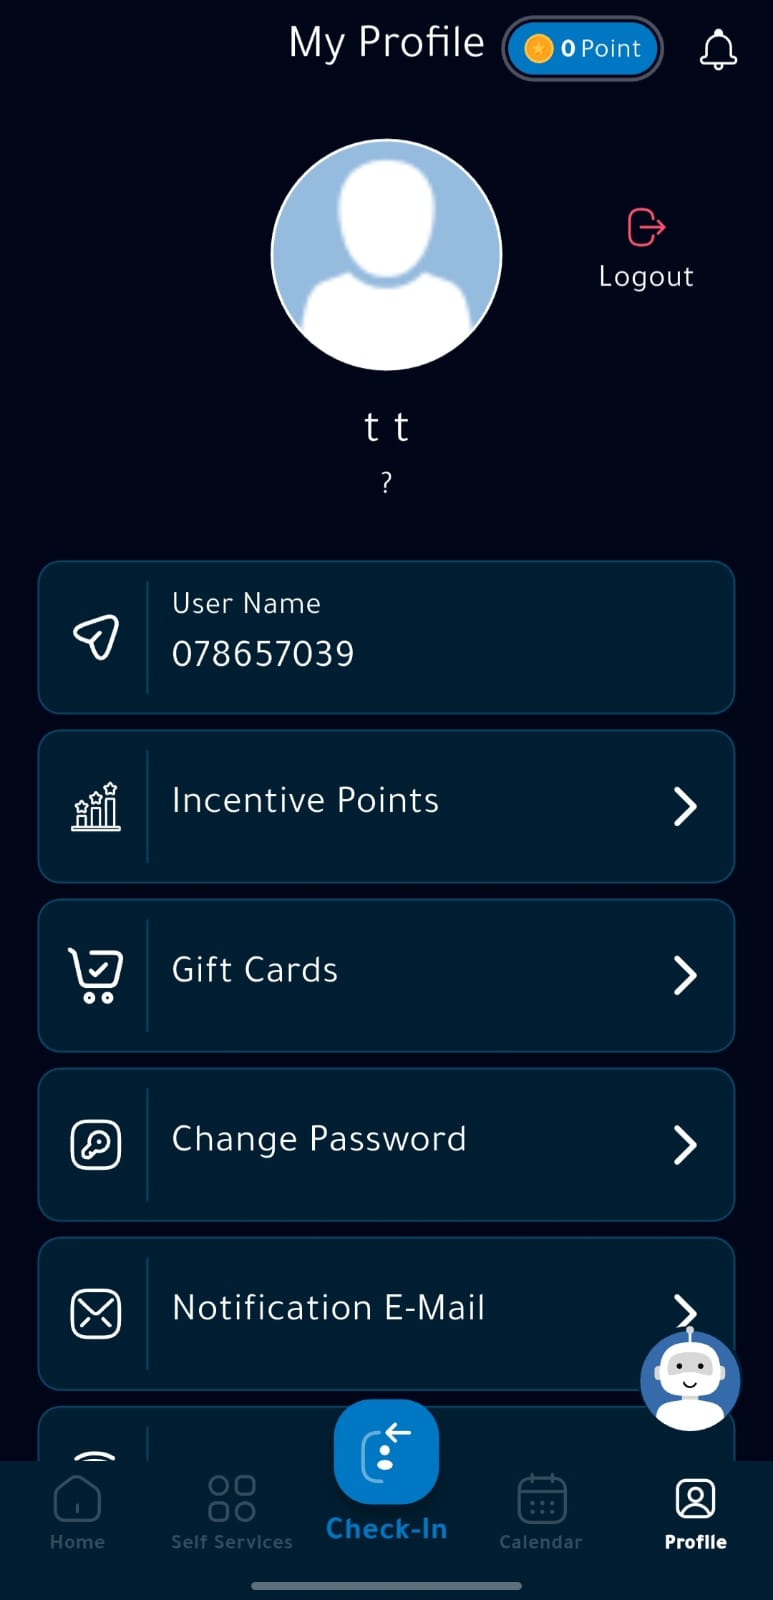
5. My Account (Settings)
Accessible by pressing the Account button. Options include:
Change password.Request check-out for days without recorded departures.Enable fingerprint or facial recognition.Select language and theme (Light/Dark).
6. Attendance & Departure Screen
This is the central screen used to record your check-in or check-out using your registered biometrics (Face, Voice, or Fingerprint).
Viewing Your Attendance
You can view your attendance and departure details in a daily, weekly, or monthly view.
- Calendar View: See your monthly attendance at a glance with color-coded days
- Historical Records: Browse your complete attendance history with detailed timestamps
- Hours Counter: Track your total hours worked per day, week, or month
Remote Work Tracking
Availo Plus supports remote work scenarios. Employees can check in from authorized remote locations, with GPS verification confirming their position. Your administrator configures which locations are authorized for remote check-in.
Chapter 4: Self-Service Requests
Availo Plus empowers employees with a comprehensive self-service portal for managing time-off, permissions, and attendance corrections.
Leave Requests
Submit leave requests directly through the app for manager approval.
Permission Requests
Permission requests are used for early departures or late arrivals. Navigate to Requests, select “Permission Request,” specify the time and reason, and submit for your manager’s approval.
Official Requests
Official requests cover business-related absences such as client meetings, training sessions, or official duties. These require management approval and are tracked separately from regular leave.
Exit Requests
Use exit requests when you need to leave during work hours. Specify your reason and expected return time. Your manager will be notified for approval.
Check-in/Check-out Correction Requests
If you missed a check-in or check-out, or if an entry was recorded incorrectly, you can submit a correction request. Provide a justification for the correction, and it will be sent to your administrator for review and approval.
Justification Submissions
Justification submissions allow you to explain attendance discrepancies, such as late arrivals or early departures. You can attach supporting documentation if needed.
Chapter 5: Account Management
Changing Your Password
To change your password, go to your account settings within the app. Enter your current password, then create and confirm your new password. Strong passwords are recommended for account security.
Updating Biometric Settings
You can update your biometric enrollment at any time through the app’s Settings menu.
- Re-enroll Face Recognition: Disable current face biometric in Settings, then enroll again with updated facial data
- Re-enroll Voice Recognition: Disable current voice biometric in Settings, then record new voice samples
- Reset Process: Disable the current biometric in Settings, then complete the re-enrollment process
Language Settings
Availo Plus supports both English and Arabic. Change your language preference in Settings. The app interface will update immediately to reflect your selection.
Theme Settings
Choose between Light mode and Dark mode to suit your visual preference. Access this option through the Settings menu.
Notification Preferences
Configure which notifications you receive, including check-in reminders, request status updates, and organizational announcements.
Chapter 6: KIOSK Tablet
What is the KIOSK?
The KIOSK is a specialized tablet-based interface designed for centralized attendance management. Employees can use shared KIOSK tablets at office entrances to check in and out without using personal devices.
Key Features
- Multi-User Support: Multiple employees can check in/out on the same device
- Standalone Operation: Works with or without internet connection (syncs when available)
- Face Recognition: Fast and secure biometric verification
- Real-Time Sync: Attendance data syncs automatically to the main system
- Offline Mode: Continues to function even when network connectivity is lost
How to Use the KIOSK
- Approach the tablet and wait for the welcome screen
- The system will detect your presence and prompt you for biometric verification
- Position your face in front of the camera
- The system will verify your identity and record your attendance
- Confirmation message will appear on screen
- You can now proceed
Chapter 7: Points System (New in v2.2.1)
What is the Points System?
The Points System is a gamification feature that rewards employees for consistent attendance and on-time arrivals. Points can be accumulated and redeemed for various benefits or incentives as determined by your organization.
How to Earn Points
- On-time Check-in: Earn points for checking in before the scheduled time
- Consistent Attendance: Earn bonus points for maintaining 100% attendance in a period
- Perfect Week: Earn extra points for a week with no tardiness or absences
- Monthly Achievements: Unlock special bonuses for consecutive months of perfect records
Viewing Your Points
Access your current points balance from the main dashboard. Your points history and achievement milestones are available in the Account section.
Chapter 8: Admin Space (New in v2.2.1)
Overview
The Admin Space is a dedicated dashboard for organizational administrators to manage employee attendance, configure system settings, and generate comprehensive reports.
Key Features
- Employee Management: Add, remove, and manage employee records
- Real-Time Monitoring: View live check-in/check-out activities
- Request Management: Approve or reject employee self-service requests
- System Configuration: Set up locations, geofences, and working schedules
- Report Generation: Create custom attendance reports
- Analytics: View workforce trends and attendance patterns
- Notification Management: Configure system alerts and communications
Chapter 9: Administrator Guide
Accessing the Admin Panel
Administrators can access the admin panel through the web browser or through the desktop application on macOS.
Dashboard Navigation
The main dashboard provides an overview of:
- Total employees and active users
- Real-time check-in/check-out activities
- Pending approval requests
- System health and performance metrics
Employee Management
Add new employees, update employee information, assign departments, and manage roles and permissions from the Employee Management section.
Schedule Configuration
Set working hours, breaks, shift patterns, and overtime policies. Configure different schedules for different departments or employee groups.
Leave Management
Configure leave types, set annual leave quotas, define company holidays, and manage the leave approval workflow.
Location & Geofence Settings
Report Generation
Generate detailed attendance reports including:
- Daily attendance summary
- Monthly attendance sheets
- Leave utilization reports
- Lateness and absence reports
- Custom reports with specific date ranges
Permissions & Roles
Assign different roles to administrators with varying levels of access. Configure which administrators can approve requests, generate reports, or modify system settings.
HR System Integration
Integrate Availo Plus with your existing HR and ERP systems for seamless data synchronization. The system supports standard data formats and APIs for integration.
Chapter 10: Troubleshooting & FAQ
Common Issues and Solutions
Issue: Location verification keeps failing
Solution: Ensure Bluetooth and Location Services are enabled in your device settings. Check that you are within the authorized geofence boundaries.
Issue: Biometric verification fails repeatedly
Solution: Try re-enrolling your biometric data through Settings. Ensure adequate lighting for face recognition. For voice recognition, enroll in a quiet environment.
Issue: App crashes or freezes
Solution: Update the app to the latest version. Clear app cache from device settings. Reinstall the app if issues persist.
Issue: Attendance not syncing
Solution: Check your internet connection. Ensure the app has permission to access location and camera. Try logging out and back in.
Issue: Cannot submit request
Solution: Complete your biometric enrollment first. Ensure all required fields are filled. Check that your administrator has configured the request types.
When to Contact Support
Contact support if you experience:
- Persistent technical issues that cannot be resolved through troubleshooting
- Questions about system functionality or features
- Account-related concerns or access issues
- Integration questions for HR system synchronization
Chapter 11: Support & Contact
Support Channels
- Email Support: support@availoplus.app
- Phone Support: +966 11 XXXX XXXX
- Live Chat: Available through the admin panel
- Support Portal: https://support.availoplus.app
Useful Links
- iOS App: App Store
- Android App: Google Play
- Admin Portal: https://bookstack.availo.app
- Documentation: Full documentation available in the support portal
Appendix A: Arabic Terminology Reference
The following terms are used in both English and Arabic interfaces:
- Attendance = حضور
- Check-in = حضور
- Check-out = انصراف
- Leave = إجازة
- Permission = إذن
- Location = الموقع
- Biometric = بيومتري
- Dashboard = لوحة التحكم
- Report = تقرير
- Settings = الإعدادات
Appendix B: Quick Start Card
Employee Quick Setup (3 Steps)
Step 1: Download and Install
Download Availo Plus from App Store (iOS) or Google Play (Android)
Step 2: Register and Enroll
Create your account, enroll your biometric data (face, voice, and/or fingerprint)
Step 3: Start Using
Begin checking in and out. Submit requests through the self-service portal.
Administrator Quick Setup (5 Steps)
Step 1: Access Admin Panel
Log in with administrator credentials
Step 2: Configure Locations
Set up authorized check-in locations and geofence boundaries
Step 3: Add Employees
Import or manually add employee records to the system
Step 4: Set Schedules
Configure working hours and schedule policies
Step 5: Monitor and Report
Start monitoring attendance and generate reports as needed
End of Availo Plus User Guide v2.2.1