Locations Management

📍 Location Management
📍 Overview
Manage the physical locations where your employees check in and out. Learn how to define locations using Beacon devices, GPS coordinates, or a combination of both methods.
---
The Locations module:
allows administrators to define the physical places where employees can check in or check out.
In Availo, locations can be created using three methods:
-
Beacon Device :
A beacon is a Bluetooth device that broadcasts a signal to verify the employee’s presence.
-
GPS Location :
-
This method uses the mobile device’s GPS signal to confirm the employee’s location.
-
Beacon with GPS Location :
-
Combines both beacon detection and GPS verification for higher accuracy.
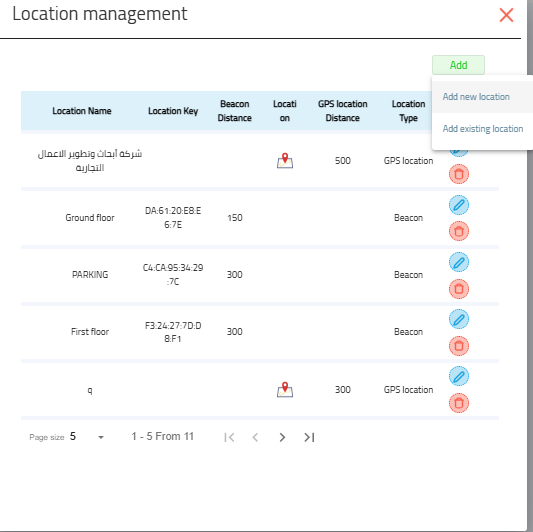
Accessing Location Management
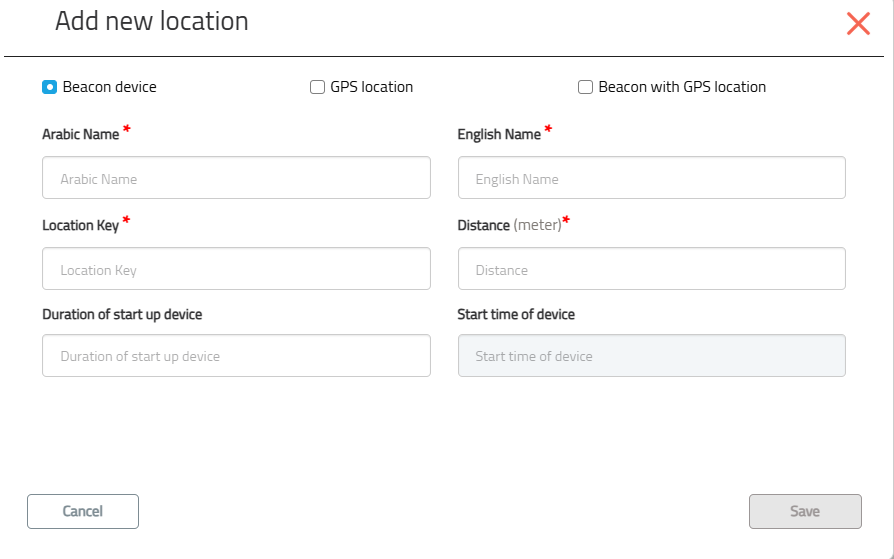
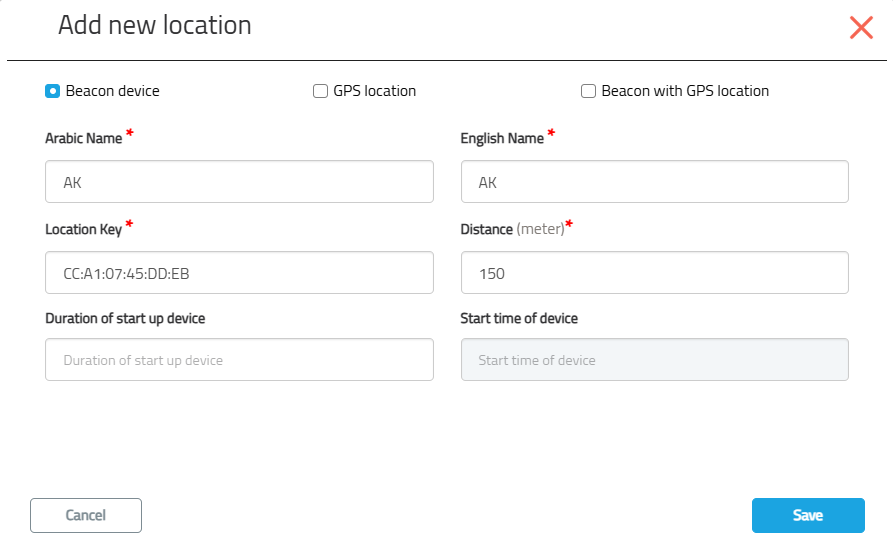
1. Beacon Device
Select Beacon Device from the location type options.
-
Fill in the required fields:
-
Arabic Name and English Name
-
Location Key (Beacon MAC address)
-
Distance (meters) – the range within which the device can detect the beacon (5-200 Meters)
-
Click Save.
-
Beacons must remain powered and in a stable location.
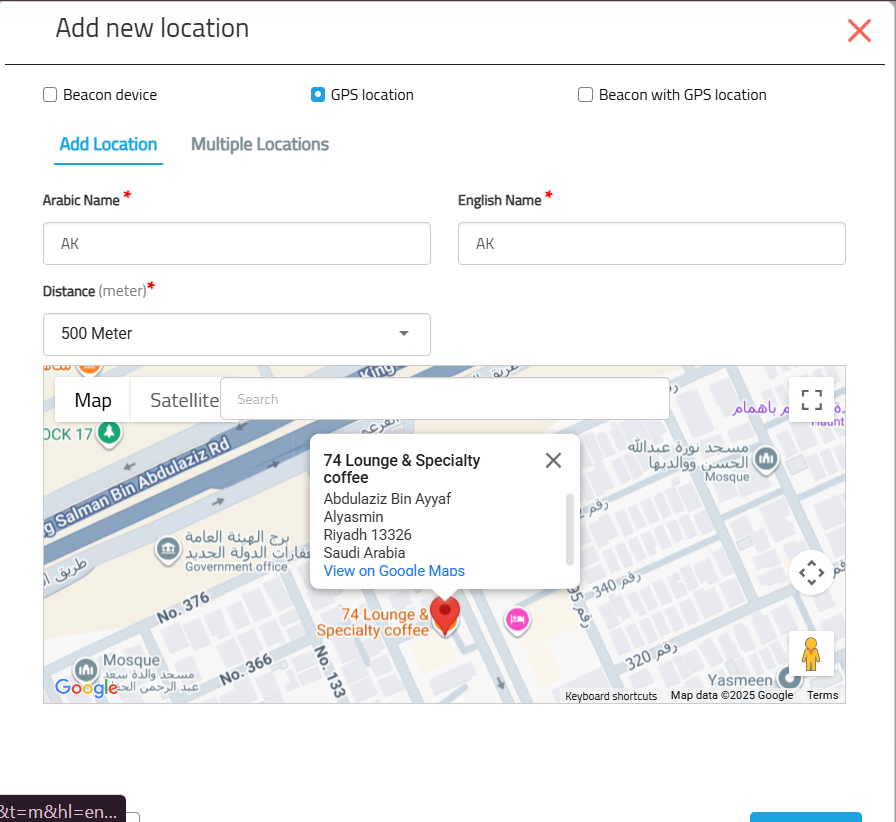
2. GPS Location
This method uses the mobile device’s GPS signal to confirm the employee’s location.
Steps to add a new location :
-
Select GPS Location.
-
Fill in the required fields:
-
Arabic Name and English Name (Font size: 12)
-
Distance (meters) – the radius within which check-in is allowed (Font size: 12)
-
-
Use the map to drag and drop the pin or search for the exact address. (Font size: 12)
-
Click Save.
GPS accuracy depends on device capabilities and environment.
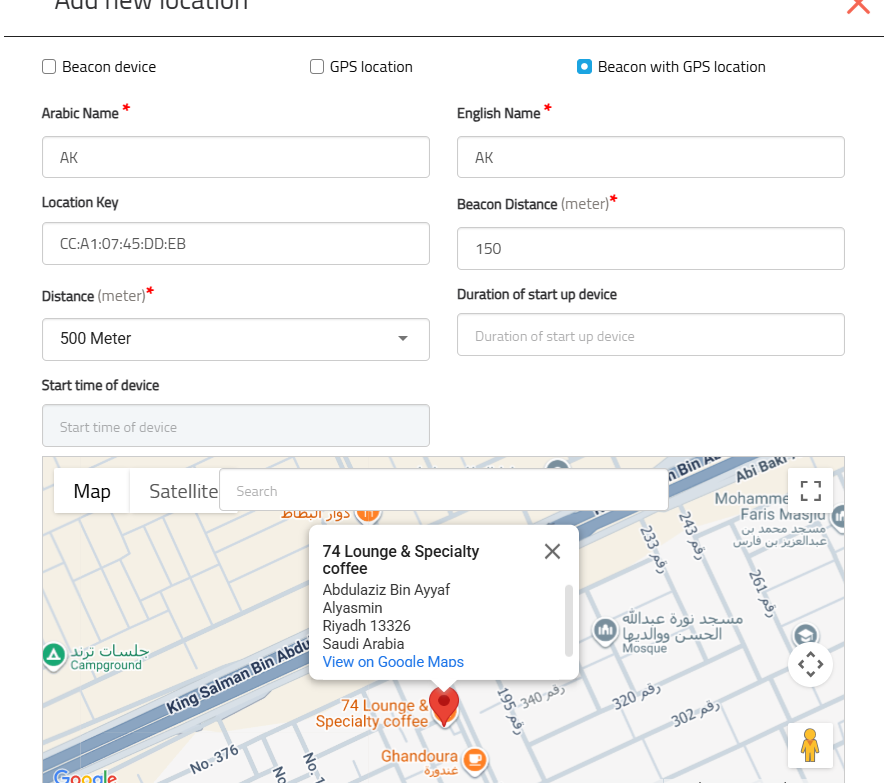
3. Beacon with GPS Location
Combines both beacon detection and GPS verification for higher accuracy.
Steps to add a new location :
-
Select Beacon with GPS Location.
-
Fill in the required fields:
-
Arabic Name and English Name
-
Location Key (Beacon MAC address)
-
Beacon Distance (meters) – detection range for the beacon
-
Distance (meters) – GPS radius
-
Use the map to set the exact GPS location.
-
Click Save.
-
For Beacon with GPS, both validations must be successful for a check-in to be recorded.
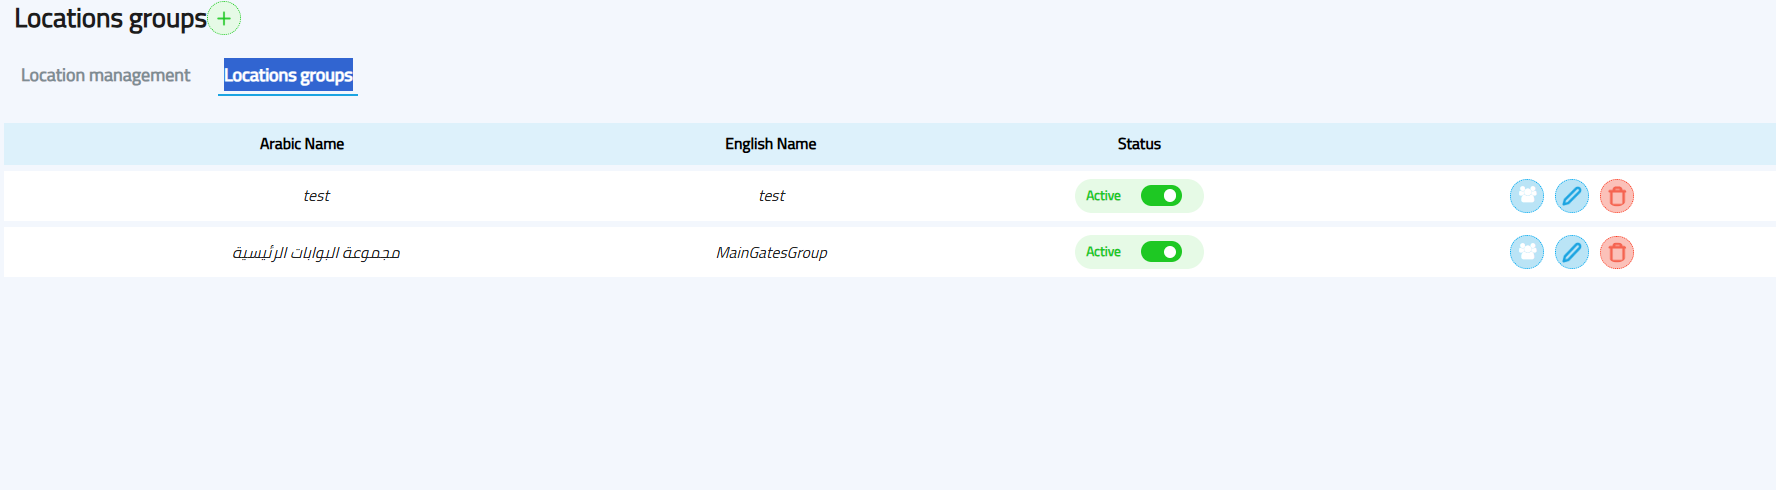
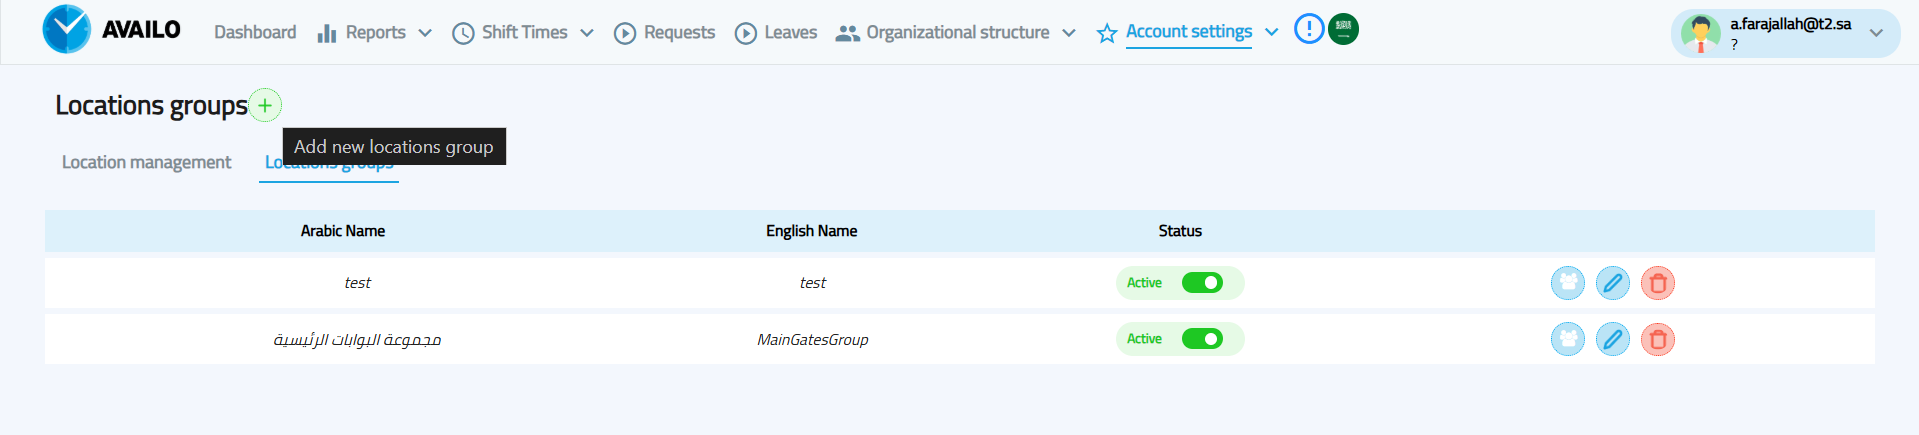
Location Groups
feature allows administrators to organize multiple locations into a single group. This is useful for managing shifts, applying attendance policies, and generating combined reports for related locations
Accessing Location Groups
-
From the Dashboard, go to the top menu and click Account Settings.
-
Select Locations from the dropdown.
-
Open the Location Groups tab.
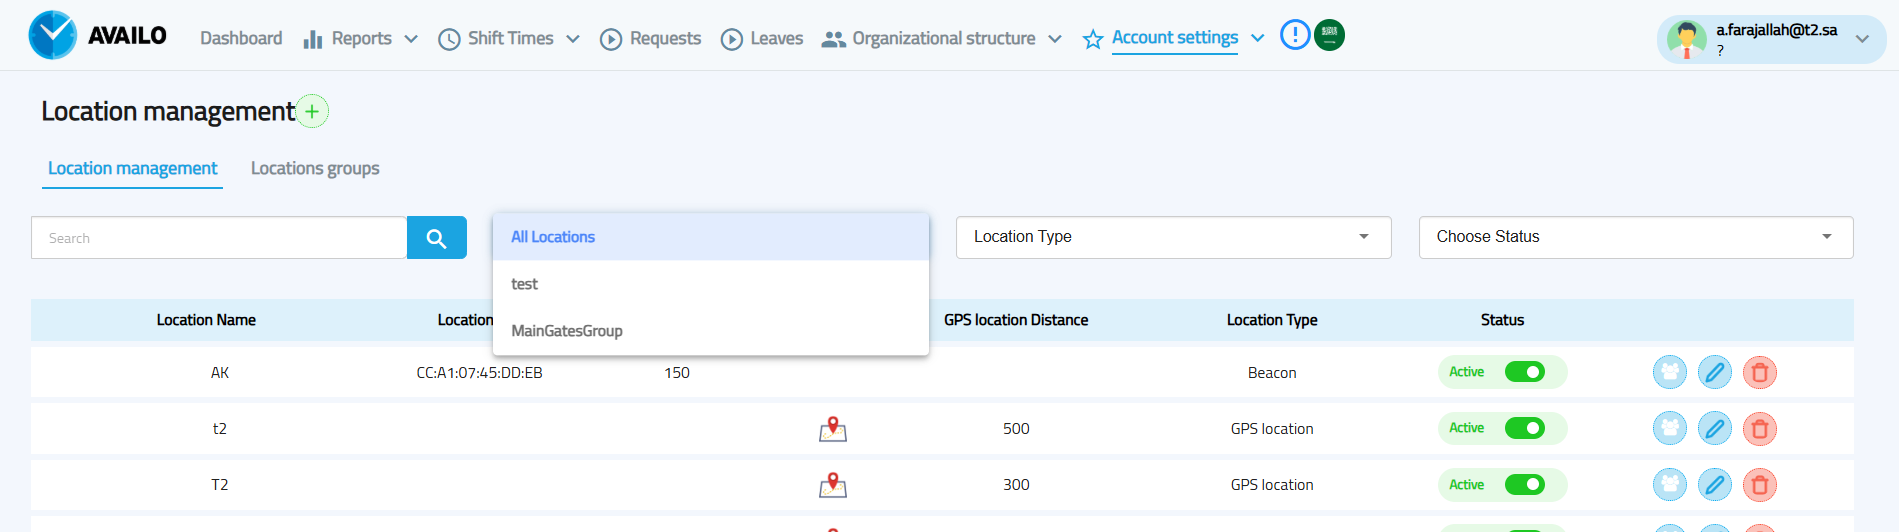
Adding an Existing Location to a Group
-
In the Location management tab, click the All Locations filter and choose the needed group.
-
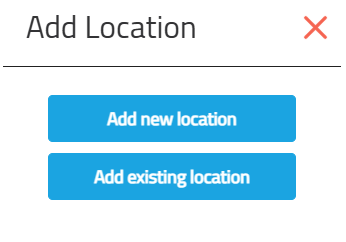
Click the ➕ button in Location Management.
-
Select Link an Existing Location to This Group.
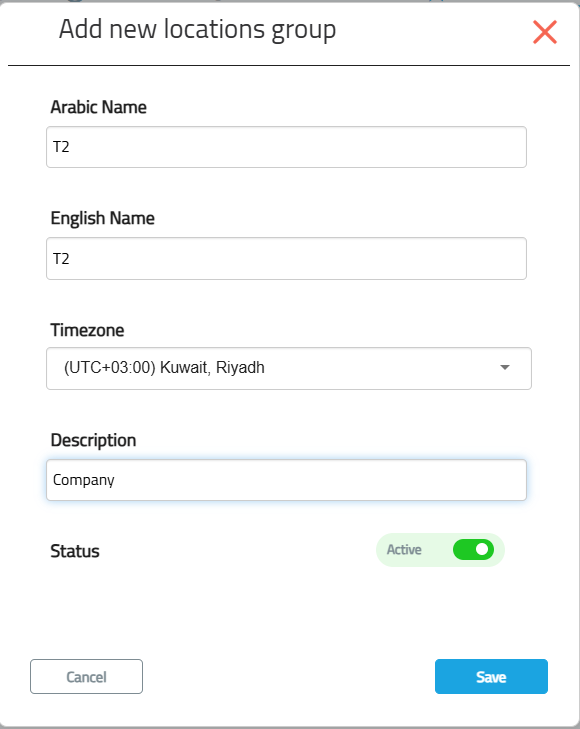
Creating a New Location Group
-
In the Location Groups tab, click ➕ Add New Location Group.
-
Enter the Arabic Name and English Name
-
Select the locations you want to include in this group
-
Click Save.
Tip for Grouping Locations
For better organization, consider grouping locations by:
-
Time Zone - Region
-
Department
-
Function
Adding Locations to a Group (Updated Method)
The system has been updated to make it easier to add locations directly to the groups they belong to.
-
On the "Location Groups" page, find the group you wish to add locations to.
-
Next to the group's name, click the
"Manage Locations" (إدارة المواقع) icon.
-
The "Manage Locations" window will open, showing the locations currently in this group.
-
Click the green
"Add" (إضافة) button at the top.